![]() Page is locked
Page is locked
Table of Contents
West HampsteadPanel 2
Introduction
Ground Frames
Kentish Town
Carlton Road Junction
Belsize Tunnels
West Hampstead Thameslink
Cricklewood
Cricklewood Up Goods
Cricklewood Depot
Dudding Hill Junction
Line Speeds
West Hampstead
Panel 2
Introduction
Like Panel 1, this is geographically a fairly short panel but is probably the most complex of all four. It features the branch to Junction Road Junction and all three legs of the triangle towards Dudding Hill. Finally, the maintenance depot at Cricklewood completes the complexity.
Ground Frames
This panel features a number of ground frames. Generic operation of these are explained in the section on Lever Frames with specific detail below.
Kentish Town
Four platforms are available here. Mostly only platforms 1 and 2 are used but later timetables use platform 3 as well. Platform 4, having no access to Farringdon, is rarely used.
Platform 2 has a fixed red signal at the Up end (WH430). Therefore only trains which reverse upon arrival should be signalled into this platform from the Carlton Road end.
Carlton Road Junction
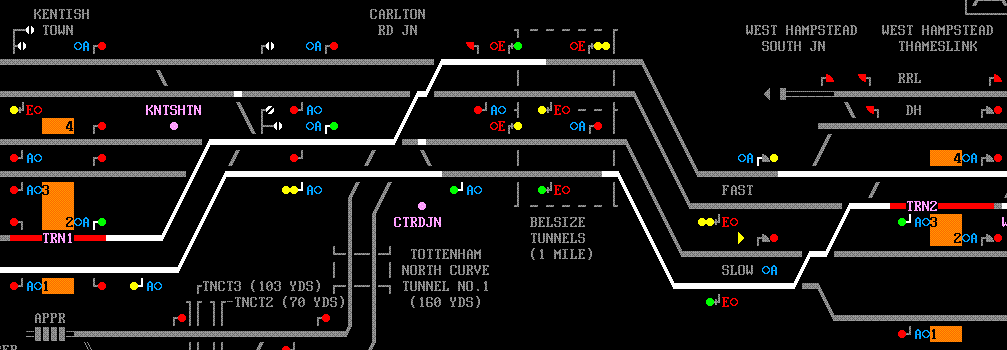
Trains on the Up Slow for St. Pancras need to be signalled towards signal WH212 and then to WH8, WH208, or WH432 in order to reach their destination. Trains on the Up Fast for Farringdon need to be signalled towards signal WH212 and then to WH422 or WH432 in order to reach their destination.
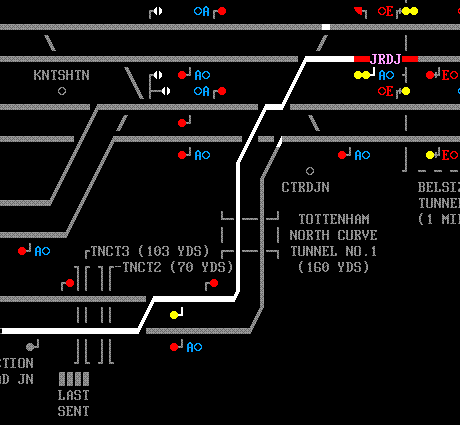
Trains on the Up Fast towards Junction Road Junction need to be signalled from WH14 to WH434 and then to UH1066. It is a very short section on the approach to WH434 so try not to hold any trains here except perhaps a light engine.

Up Fast Carlton Road Junction to Junction Road Junction routing.
Belsize Tunnels
These tunnels are about a mile long each. Until 2009 there was only a single signal section on each line which severely limited the headway through the tunnel - two trains following each other would mean the second train got delayed outside the tunnel until the first cleared the section. Judicious use of the single-lead junctions either side of the tunnel can help keep trains rolling, as shown in the diagram below:

West Hampstead Thameslink
Down freight trains can be signalled off the Down Fast onto the Down Hendon Lines here, around the back of the station. Trains can also be run-round on the run-round line (RRL) with the loco using the spur and the Down Hendon line.
Trains can also be run round between West Hampstead North Junction and Cricklewood South Junction. Check the timetable to see which location is scheduled to be used.
The Down Carriage Loop allows empty stock to be recessed temporarily whilst awaiting access to Cricklewood Depot.In reality this doesn't happen these days and the line is out of use.
Cricklewood
Around the back of the station, by platform 1, is a Departure and Reception line. As the name suggests, this can be used both for departing trains from the depot, and arriving trains into the depot. In reality, arriving trains are usually signalled through platform 2 though.
Cricklewood Up Goods
The four exit signals from these two lines (WH456, WH458, WH487, and WH489) can only show red, yellow, or a shunt aspect.
Cricklewood Depot
There are three reception roads, labelled REC1, REC2, and REC3. Any can be used for arriving trains without penalty.
Most high speed trains leave from the Up Departure. Up to two trains can be waiting, using the two TD berths available (the simulation will not allow more than two trains to be ready here).
The Sidings area is where many trains are stabled. Some will be timetabled to arrive straight into the Sidings rather than going via the Reception lines. Many trains also depart from the Sidings straight onto the Goods lines.
The Goods lines can hold trains up to around 460m long.
Dudding Hill Junction
Cricklewood, Dudding Hill, and Brent Curve Junctions form a large triangle. Thus, trains can come from Dudding Hill and head either north (Down) or south (Up). The occasional train may not head directly around the triangle but reverse on one end so the timetable should be consulted.
Line Speeds
The Fast lines increase in speed from 70mph to 100mph in stages from Kentish Town to the Cricklewood area. The Up & Down Slow is 50mph between Camden Road Tunnels (exclusive) to Carlton Road Junction. The Up & Down Relief is 30mph between Camden Road Tunnels (exclusive) and Kentish Town.
The crossovers at Kentish Town on the Slow lines are 30mph, with the Slow to Fast and Fast to Fast crossovers at 50mph. The crossovers at Carlton Road Junction are 50mph. The junction towards Junction Road Junction is only 10mph so long trains may take some time to clear the main lines here; however, the line speed then increases to 20mph towards Junction Road Junction.
The Slow lines increase from 75mph to 90mph in stages from Carlton Road Junction to the Cricklewood area.
Up trains crossing from the Up Fast to the Up Slow at West Hampstead can do so at 50mph. Down trains crossing from the Down Slow to the Down Fast can do so at 40mph.
The Hendon Lines are mostly at 30mph from West Hampstead to Hendon.
Crossovers in the West Hampstead North Junction and Cricklewood areas range from 20mph to 30mph.
Most of the pointwork in the Cricklewood Depot area are rated at 20mph with sidings and some less commonly used points at 15mph. However, the Goods lines are rated at 45mph for their length - which is not much!
Both sides of the top side of the triangle to Dudding Hill have speeds of 30mph with some 20mph running.
Last edited by Steamer on 20/12/2020 at 14:08