![]() Page is locked
Page is locked
Table of Contents
West HampsteadReference Section
Signal Number Plan
Signal Box Prefix Codes
Timetabling Details
TIPLOC Codes
Gradients
Splash Screens
External Resources
Signal Directory
Version History
West Hampstead
Reference Section
Signal Number Plan
These are Adobe Acrobat PDF files. If you don't have Adobe Acrobat Reader installed on your computer you can get a free download of the latest version from the Adobe website .
Signal Box Prefix Codes
| Code | Box |
|---|---|
| BS | ??* |
| LR | Leicester* |
| DH | Dudding Hill Junction* |
| UH | Upper Holloway* |
| VS | Victoria (Eastern Panel)* |
*Fringe box, signals not controlled in this simulation.
Non-Prefixed signals are controlled by West Hampstead (plated WH on the ground)
Timetabling Details
Cricklewood Dep/Rec Line
There are two options for timetabling this location. If the train must be routed via the Dep/Rec line, use location "Cricklewood Dep/Rec" (TIPLOC CRKLWRL). The train will not accept any route other than on to the Dep/Rec line. However, if the train may be routed via Cricklewood platforms 1 or 2, use location "Cricklewood" with a platform code of "DER". The train will accept routing via platforms 1 or 2, or the Dep/Rec line. Most trains should use this latter option as there is rarely a requirement to use the Dep/Rec line in reality - it is there more for timetabling convenience as a hint to the signallers.
Down Trains Departing St. Pancras (old)
The timetabled time for trains leaving St. Pancras (old station), up the steep gradient, was fairly tight and trains would frequently be half a minute or more late. It is recommended to use the published timings rather than try to adapt to what is more achievable, even if trains will be slightly late (a minute late does not incur a penalty anyway).
TIPLOC Codes
Gradients
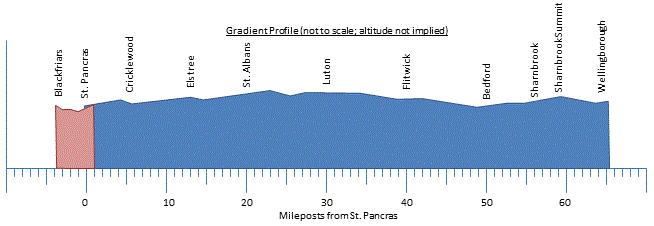
St. Pancras to Wellingborough
Immediately leaving St. Pancras, trains have to attack uphill gradients ranging from 1 in 92 to 1 in 110 before easing slightly downhill to Dock Junction North. The line climbs gently to Kentish Town.
With gradients ranging from 1 in 131 to 1 in 371, the line climbs uphill from Kentish Town before levelling off at Cricklewood South Junction. The line then drops at 1 in 196 to a low at Brent Curve Junction before rising again at 1 in 191 towards Hendon.
From Cricklewood Curve Junction to Dudding Hill Junction, the line falls at 1 in 132 for half its length, followed by a steeper 1 in 70 drop the rest of the way.
Brent Curve gradient unknown.
The Hendon Lines over the Fast lines and Down Slow rise at 1 in 220 to the top of the flyover before dropping to 1 in 200 at Silkstream Junction. Over the same stretch, the Fast and Slow lines dip gently at 1 in 374 under the flyover before rising to meet the Hendon lines at 1 in 166 (varies slightly according to line).
The four lines now rise at a maximum gradient of 1 in 154 all the way to Elstree & Borehamwood station where a 1 in 200 descent takes the lines down to Radlett station. There is a short rise and fall, bottoming out at Redland Road Stone Siding. Heavy freight trains out of the latter may struggle up the ruling gradient of 1 in 163 to just north of St. Albans.
Various meanderings up and down then dominate all the way to Leagrave, each rarely more than a mile in length.
Northwards (Down) from Leagrave, the tracks rise and fall only gently until around MP34 where a 1 in 202 falling gradient begins, continuing for nearly six miles. Two miles of gently meandering up and down gradients follow before a descent of 1 in 200 through and beyond Ampthill Tunnels. Gradients continue downhill, varying slightly, before levelling off at milepost 47.5, just beyond Elstow. A quarter mile each of 1 in 630 uphill followed by 1 in 178 takes the line over the Bedford to Bletchley line before a mile of 1 in 184 and 1 in 163 takes the line downhill to the last signals approaching Bedford on the slow lines. The station is then approached on a gentle downhill before rising again through the station at 1 in 177, continuing uphill to Bedford North Junction. A brief lull in gradients allows respite before attacking a mile and a half of gradients uphill ranging from 1 in 174 to 1 in 264. Two miles of up- and downhill meanderings follow before the attack on Sharnbrook. This starts at MP55 with steepnesses ranging from 1 in 100 to 1 in 200.
At Sharnbrook Junction the Fast and Slow lines continue separately:
- The Fast lines have a fairly steep uphill gradient of 1 in 119 to Sharnbrook Summit, at milepost 59.5. The line then falls for the next 2.5 miles at 1 in 120 and continues for another 2.5 at gentler descents before reaching Wellingborough.
- The Slow line has a much gentler ascent of 1 in 200 as far as Sharnbrook Tunnel where the direction switches to downhill at 1 in 846 downhill. Gradients around 1 in 200 downhill take the Slow line down to Wellingborough.
Moorgate Branch
Moorgate station is on the level. A brief dip downhill over the pointwork dives the line into Barbican Tunnel where the line climbs again at 1 in 58 and then 1 in 66. Barbican to Farringdon has moderate gradients throught, before a final 1 in 54 downhill into Farringdon.
Blackfriars Branch
From Blackfriars there is a steep 1 in 29 downhill into City Thameslink station. The latter is on a continuing downhill gradient of 1 in 32 before the line levels off just beyond the station for the run into Farringdon.
Farringdon Line to Kentish Town
A section of 1 in 29 followed by 1 in 33 takes the line down and under the Circle and Metropolitan LUL lines before the line climbs at a gentler 1 in 97 most of the way to King's Cross Thameslink alongside the LUL lines, albeit in a separate tunnel. Various more gentle gradients up and down take the line to St. Pancras International (Low Level) where a 1 in 66 gradient indicates the start of the climb out to daylight. A final section of 1 in 70 takes the Moorgate Lines out of the ground to meet the main lines out of St. Pancras. The line then climbs gently to Kentish Town.
Splash Screens
| Splash1 | The operating floor at West Hampstead PSB. The WestCad workstation which replaced panel 1 is in the foreground, with panels 2-4 running round the back of the room |
| Splash2 | Kentish Town, Carlton Road Jn and the Upper Holloway branch on the real panel |
| Splash3 | A close-up of Bellsize Tunnels; 1D64 is approaching signal 199. |
| Splash4 | Cricklewood and the Brent triangle on the real panel |
| Splash5 | The Panel 3/4 boundary; St. Albans is at the bottom left of frame, with Luton in the top left. |
| Splash6 | The northern fringe to Leicester on the real panel; 1P69 approaches signal 180. |
External Resources
Here are some useful and/or interesting links about West Hampstead and the Midland Main Line. As we have no control over external sites, we can't guarantee that these links are live and appropriate for all ages.
Cab Ride Videos
| http://www.youtube.com/watch?v=uZTOhQ3srYo | Filmed in 2008, this is a shaky home video of a cab ride from St. Pancras to Leicester. It has been edited down to a little under 10 minutes though. |
| http://www.youtube.com/watch?v=3Oolft15WRw | As above but Luton Parkway to St. Pancras. |
| http://www.youtube.com/watch?v=0KkzePL78fs | Brighton to Blackfriars, filmed professionally by Track Access Services (TAS) as a route learning video. |
| http://www.youtube.com/watch?v=XVsxipwt7EY | St. Albans to Hendon, by TAS. |
| http://www.youtube.com/watch?v=ZBy4ncMqjm8 | Cab ride - Meridian class 222 0-110 mph |
Signal Directory
Version History
Last edited by Steamer on 20/12/2020 at 15:00